2022. 10. 23. 01:26ㆍ배울수록 연봉은 늘어간다./자바스크립트

- ▲ 위에 보이는 화면처럼 웹페이지를 만들어 봅니다.
- 프로그램은 구름 IDE를 사용했습니다.
- 소프트웨어 스택은 HTML , CSS, JS 선택을 했고 프로젝트는 빈 프로젝트로 시작하였습니다.
- github 링크 :https://github.com/develup-official/htmlcss-s01e03
1. 터미널에서 깃허브 링크 불러오기
- 터미널에 git clone 링크 주소를 입력하세요.
2. 파일 만들기
- 다운로드한 폴더에 파일을 만들어 줍니다.
- 문자는 대소 문자를 구분합니다.
- 특수문자는 언더바나 하이픈 정도만 쓰도록 합니다.
- 파일명 : index.html
- 파일명 : style.css
3. 꼭 알고 넘어가야 할것은??
- css의 우선 순위에 대해 알고 넘어 갑니다.
https://drive.google.com/file/d/1uMjjUpMDQOxRs5r-N9IhNWa7omOR2EJ2/view?usp=sharing
Google Drive: 로그인
이메일 또는 휴대전화
accounts.google.com
- class 명은 숫자로 시작할 수 없습니다.
- 너무 짧은 클래스명은 피하는게 좋습니다. 어느 정도 의미는 있어야 합니다.
- div는 블럭 요소라고 부릅니다. 한줄에 하나씩 배치가 됩니다.
4. 기본 틀을 잡아 줍니다.
| html | css |
 |
 |
실행화면▼
 |
실행화면과 예제를 보게 되면 푸터의 박스 위치는 같지만 컨텐츠의 박스는 끝에 붙지 않고 여백을 남겨두고 싶습니다.
하지만 보는바와 같이 컨텐츠의 박스안에 글자들은 붙어 있습니다.
지금부터 이것을 해결해 봅시다.
| html | css |
| <html> <head> <title>Robots</title> <link rel="stylesheet" href="style.css"> </head> <body> <div class="box"> <div class="box-contens"> <h1>RED</h1> <P>Red Robots ipsum dolor sit amet, consectetuer adipiscing elit. Aenean commodo ligula eget dolor. Aenean massa. Cum sociis natoque penatibus et magnis </P> </div> <div class="box-footer"> ... </div> </div> </body> </html> |
h1, p { margin: 0; } /* 초기화 과정 입니다*/ body { background-color: #999; } .box { background-color: white; width: 350px; margin: 50px auto; } .box-contens { padding: 20px; } .box-footer { background-color: #efefef; } |
div 하나 더 만들어 box-contens라는 클래스를 하나 더 만들어 주고 css에서 padding을 잡아주면 해결이 됩니다.
실행화면▼
 |
5. RED 글자를 중간으로 옮겨줍니다.
| HTML | CSS |
| <!DOCTYPE html> <html> <head> <title>Robots</title> <link rel="stylesheet" href="style.css"> </head> <body> <div class="box"> <img class="box-robot" src="images/robot-red.png"> <div class="box-contens"> <h1>RED</h1> <P>Red Robots ipsum dolor sit amet, consectetuer adipiscing elit. Aenean commodo ligula eget dolor. Aenean massa. Cum sociis natoque penatibus et magnis </P> </div> <div class="box-footer"> ... </div> </div> </body> </html> |
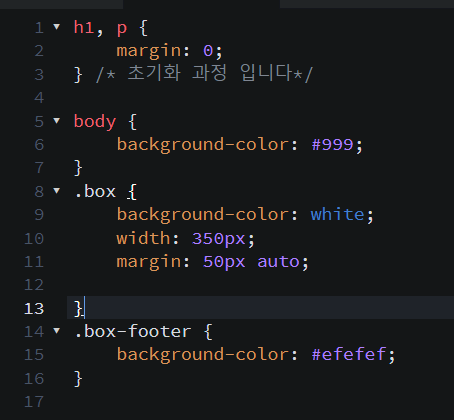
h1, p { margin: 0; } /* 초기화 과정 입니다*/ body { background-color: #999; } .box { background-color: white; width: 350px; margin: 50px auto; } .box-contens { padding: 20px; } .box-contens h1 { margin-bottom: 20px; margin: 0 auto; } .box-footer { background-color: #efefef; padding: 20px; } |
일단 이미지를 잡아 주었고 클래스명을 달아 주었습니다.
이미지를 옴기기 전에 h1 글자인 RED 글자를 디자인 하기 위해 margin-bottom을 줘서 공간을 확보했고 그 다음 중간으로 옮기기 위해 margin: 0 auto;를 주었지만 중간으로 이동을 할 수 없었습니다.
그래서 검사기를 통해 알아본 결과는???

RED에 있는 한줄이 꽉차 있는 것을 확인할 수 있었습니다.
그러면 우리가 해야 할것은 바로 width를 주어 사이즈를 줄여주어야 된다는 것을 알게되었습니다.
하지만 이렇게 하면 분명 또 다른 문제가 발생한다는 것을 알수 있습니다.
그래서 우리는 또하나 생각을 한것이 바로 박스 안에서 텍스트를 중간으로 옮겨야 된다는 것을 인지하게 됩니다.
바로 text-align 라는 속성을 사용하게 되면 해결이 됩니다.
| css | 실행화면 |
| h1, p { margin: 0; } /* 초기화 과정 입니다*/ body { background-color: #999; } .box { background-color: white; width: 350px; margin: 50px auto; } .box-contens { padding: 20px; } .box-contens h1 { margin-bottom: 20px; text-align: center; } .box-footer { background-color: #efefef; padding: 20px; text-align: center; } |
 |
6. 이미지를 중간으로 옮겨줍니다.(블럭 요소인지 인라인 요소인지)
이미지 옆에 텍스트를 적어 보면 인라인 요소인지 알 수 있습니다.
블럭요소는 한칸에 하나씩만 나오고 인라인 요소는 글씨처럼 옆으로 쭉 나열 됩니다.
<div class="box"> 는 부모이고 css에서 box에 text-align: center;를 주게되면 자식에 해당되는 모든 텍스트가 중간으로 정렬이 됩니다.
검사를 해보면???
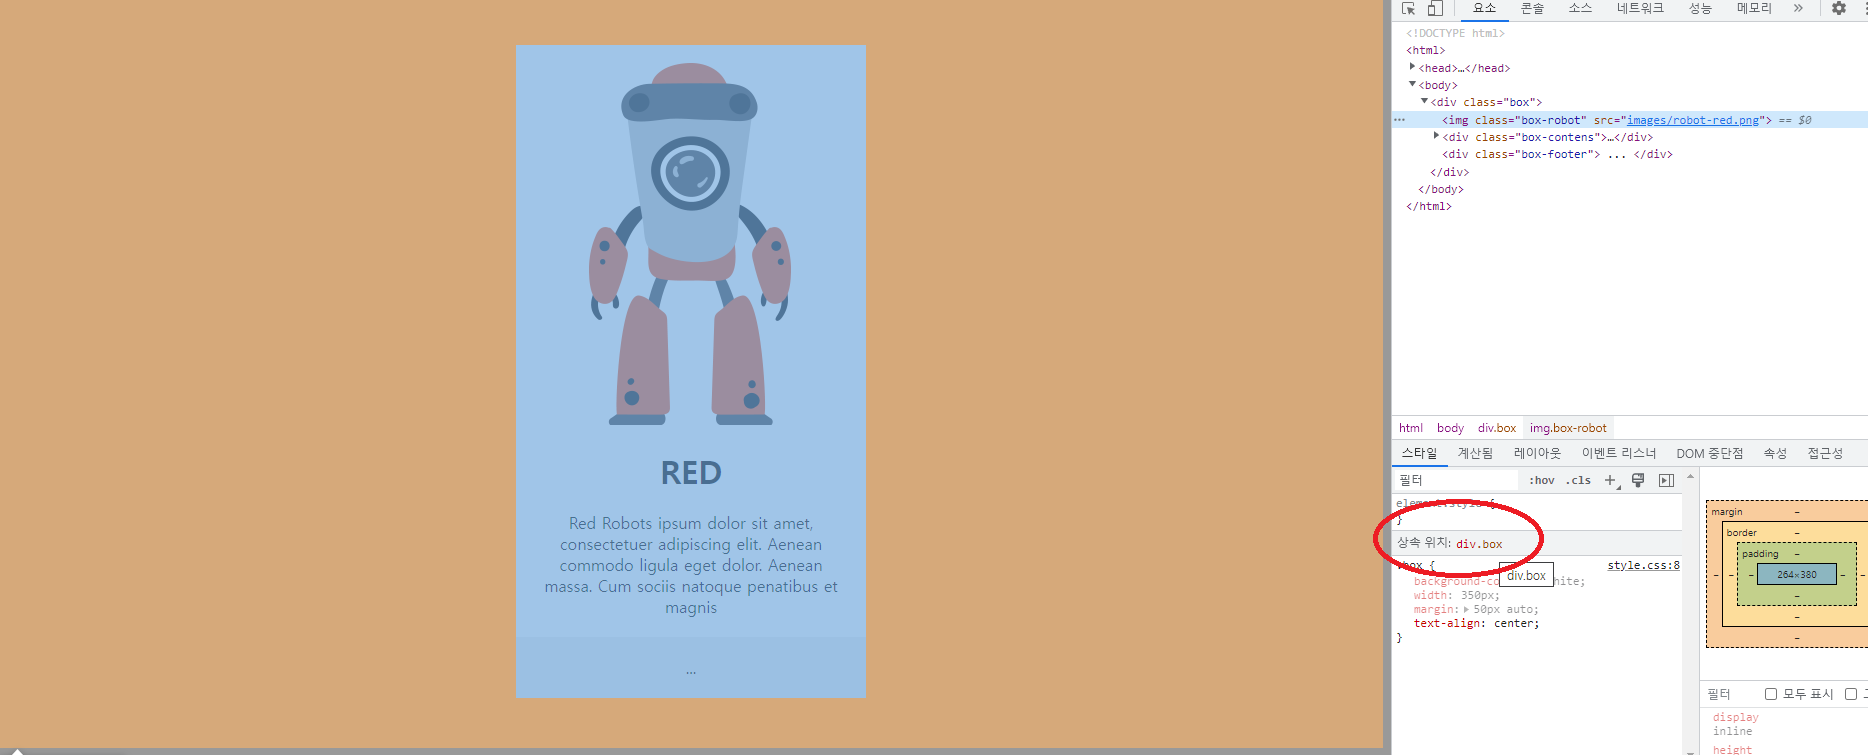
상속된 위치가 나오는 것을 확인할 수 있습니다.
부모의 위치에 text-align: center; 주게 되면 아래는 자동으로 되기 때문에 다른 자식요소에게는 줄 필요가 없습니다.
이것이 바로 상속이라는 계념입니다.
하지만 모든 자식들에게 되는 것은 아니니 유의하시기 바랍니다.
7. 인라인 요소인 a 태그를 블럭요소로 바꾸어 봅니다.
display (표시하다) 라는 뜻을 가지고 있는데 인라인 요소를 블록으로 바꾸어 줄 수 있습니다.반대로 블록의 요소를 인라인 요소로 바꾸어 줄 수도 있습니다.https://www.w3schools.com/cssref/pr_class_display.asp
CSS display property
W3Schools offers free online tutorials, references and exercises in all the major languages of the web. Covering popular subjects like HTML, CSS, JavaScript, Python, SQL, Java, and many, many more.
www.w3schools.com
https://drive.google.com/file/d/1-6N7TTbvul8wtKhQiusNgZGbVGZdim8Q/view?usp=sharing
Google Drive: 로그인
이메일 또는 휴대전화
accounts.google.com
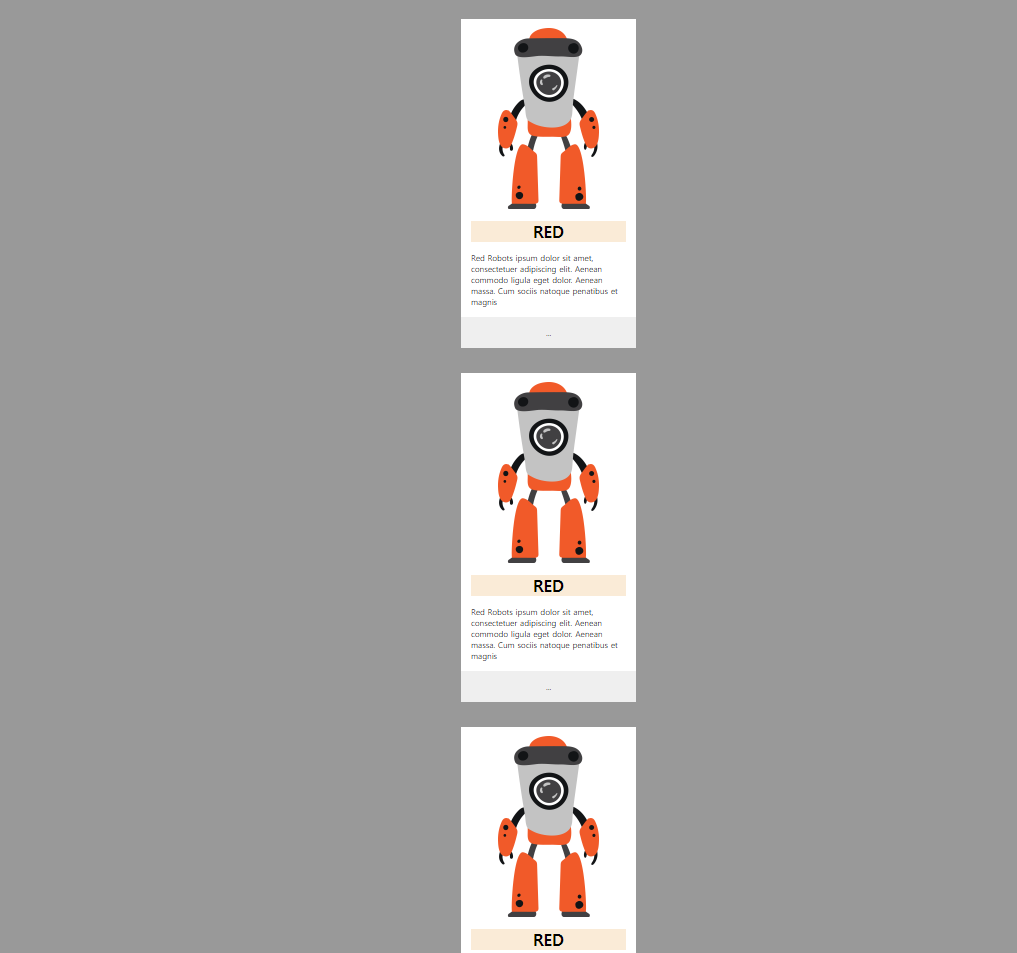
8. 위에서 배운 것을 적용해 봅니다.
- 예제와 같이 3개의 블록을 만들어 줍니다. (복붙)
| html | css |
| <!DOCTYPE html> <html> <head> <title>Robots</title> <link rel="stylesheet" href="style.css"> </head> <body> <div class="box"> <img class="box-robot" src="images/robot-red.png"> <div class="box-contens"> <h1>RED</h1> <P>Red Robots ipsum dolor sit amet, consectetuer adipiscing elit. Aenean commodo ligula eget dolor. Aenean massa. Cum sociis natoque penatibus et magnis </P> </div> <div class="box-footer"> ... </div> </div> <div class="box"> <img class="box-robot" src="images/robot-red.png"> <div class="box-contens"> <h1>RED</h1> <P>Red Robots ipsum dolor sit amet, consectetuer adipiscing elit. Aenean commodo ligula eget dolor. Aenean massa. Cum sociis natoque penatibus et magnis </P> </div> <div class="box-footer"> ... </div> </div> <div class="box"> <img class="box-robot" src="images/robot-red.png"> <div class="box-contens"> <h1>RED</h1> <P>Red Robots ipsum dolor sit amet, consectetuer adipiscing elit. Aenean commodo ligula eget dolor. Aenean massa. Cum sociis natoque penatibus et magnis </P> </div> <div class="box-footer"> ... </div> </div> </body> </html> |
h1, p { margin: 0; } /* 초기화 과정 입니다*/ body { background-color: #999; } .box { background-color: white; width: 350px; margin: 50px auto; text-align: center; } .box-robot { } .box-contens { padding: 20px; } .box-contens h1 { margin-bottom: 20px; background-color: antiquewhite; } .box-contens p { text-align: left; } .box-footer { background-color: #efefef; padding: 20px; text-align: center; } |
실행화면▼
 |
- 위 예제를 가로배치로 바꾸어 줍니다.
| css |
| .box { background-color: white; width: 350px; margin: 50px auto; text-align: center; display: inline-block; |
실행화면▼
 |
- 그 다음 body에 text-align: center;를 주어 중간으로 오게 만든는데 예제 특성상 body에 준것이고 이렇게 만드는 케이스는 거의 없다고 합니다.
body {
background-color: #999;
text-align: center;
- 나머지 h1과 이미지를 바꾸어 줍니다.
실행화면▼
 |
9. Negative Magin
마진의 마이너스 값이라고 보면 됩니다.
예제 특성상 진행하는 거니 간단히 사용법만 알고 갑니다.
| css | 실행화면 |
| .box-robot { margin-top: -300px; } |
 |
| css | 실행화면 |
| .box { background-color: white; width: 350px; margin: 400px auto 0; text-align: center; display: inline-block; } |
 |
10. h1을 디자인 해봅니다.
- border-top 과 border-bottom 값을 주어서 밑줄을 그어 봅니다.
| css | 실행화면 |
| .box-contens h1 { margin-bottom: 20px; background-color: antiquewhite; border-top: 5px solid; border-bottom: 5px solid; |
 |
- display 속성을 주어 줄의 크기를 글자에 맞게 줄여 줍니다.
- display: inline-block;
| css | 실행화면 |
| .box-contens h1 { margin-bottom: 20px; background-color: antiquewhite; border-top: 5px solid; border-bottom: 5px solid; display: inline-block; |
 |
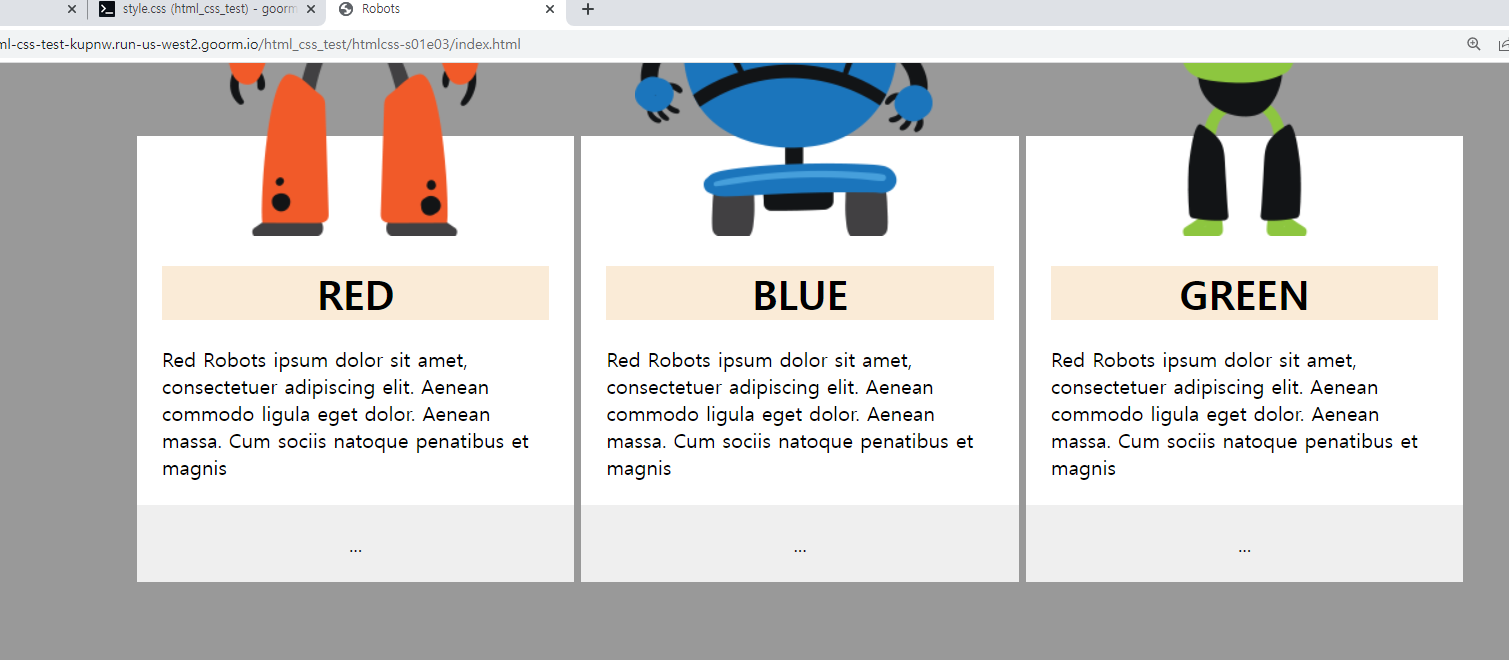
- h1의 색상도 로봇의 색상에 맞게 바꾸어 줍니다.
- 바꾸는 방법은 각각 클래스명을 달아서 바꾸어 줍니다.
| html | css |
| <!DOCTYPE html> <html> <head> <title>Robots</title> <link rel="stylesheet" href="style.css"> </head> <body> <div class="box red"> <img class="box-robot" src="images/robot-red.png"> <div class="box-contens"> <h1>RED</h1> <P>Red Robots ipsum dolor sit amet, consectetuer adipiscing elit. Aenean commodo ligula eget dolor. Aenean massa. Cum sociis natoque penatibus et magnis </P> </div> <div class="box-footer"> ... </div> </div> <div class="box blue"> <img class="box-robot" src="images/robot-blue.png"> <div class="box-contens"> <h1>BLUE</h1> <P>Red Robots ipsum dolor sit amet, consectetuer adipiscing elit. Aenean commodo ligula eget dolor. Aenean massa. Cum sociis natoque penatibus et magnis </P> </div> <div class="box-footer"> ... </div> </div> <div class="box green"> <img class="box-robot" src="images/robot-green.png"> <div class="box-contens"> <h1>GREEN</h1> <P>Red Robots ipsum dolor sit amet, consectetuer adipiscing elit. Aenean commodo ligula eget dolor. Aenean massa. Cum sociis natoque penatibus et magnis </P> </div> <div class="box-footer"> ... </div> </div> </body> </html> |
h1, p { margin: 0; } /* 초기화 과정 입니다*/ body { background-color: #999; text-align: center; } .box { background-color: white; width: 350px; margin: 400px auto 0; text-align: center; display: inline-block; } .box.red { color: orangered; } .box.blue { color: blue; } .box.green { color: green; } .box-robot { margin-top: -300px; } .box-contens { padding: 20px; } .box-contens h1 { margin-bottom: 20px; background-color: antiquewhite; border-top: 5px solid; border-bottom: 5px solid; display: inline-block; } .box-contens p { text-align: left; } .box-footer { background-color: #efefef; padding: 20px; text-align: center; } |
실행화면▼
 |
11.a 태그를 이용해 버튼을 만들어 봅니다.
- a태그는 인라인 속성을 가지고 있습니다.
- 클래스 명을 넣어 줍니다.
- a 태그도 초기화를 해줍니다.
- color: inherit을 쓰는데 상속을 받겠다는 뜻을 가지고 있습니다.
- text-decoration: none; 는 밑줄을 지우겠다는 뜻을 가지고 있습니다.
| html | css |
| <!DOCTYPE html> <html> <head> <title>Robots</title> <link rel="stylesheet" href="style.css"> </head> <body> <div class="box red"> <img class="box-robot" src="images/robot-red.png"> <div class="box-contens"> <h1>RED</h1> <P>Red Robots ipsum dolor sit amet, consectetuer adipiscing elit. Aenean commodo ligula eget dolor. Aenean massa. Cum sociis natoque penatibus et magnis </P> </div> <div class="box-footer"> <a href="" class="button">LAUNCH</a> </div> </div> <div class="box blue"> <img class="box-robot" src="images/robot-blue.png"> <div class="box-contens"> <h1>BLUE</h1> <P>Red Robots ipsum dolor sit amet, consectetuer adipiscing elit. Aenean commodo ligula eget dolor. Aenean massa. Cum sociis natoque penatibus et magnis </P> </div> <div class="box-footer"> <a href="" class="button">LAUNCH</a> </div> </div> <div class="box green"> <img class="box-robot" src="images/robot-green.png"> <div class="box-contens"> <h1>GREEN</h1> <P>Red Robots ipsum dolor sit amet, consectetuer adipiscing elit. Aenean commodo ligula eget dolor. Aenean massa. Cum sociis natoque penatibus et magnis </P> </div> <div class="box-footer"> <a href="" class="button">LAUNCH</a> </div> </div> </body> </html> |
h1, p { margin: 0; } a { color: inherit; /* 부모의 색상을 상속 받겠다*/ text-decoration: none; /*태그의 밑줄을 없애겠다*/ } /* 위에 속성은 초기화 과정 입니다*/ body { background-color: #999; text-align: center; } .box { background-color: white; width: 350px; margin: 400px auto 0; text-align: center; display: inline-block; } .box.red { color: orangered; } .box.blue { color: blue; } .box.green { color: green; } .box-robot { margin-top: -300px; } .box-contens { padding: 20px; } .box-contens h1 { margin-bottom: 20px; background-color: antiquewhite; border-top: 5px solid; border-bottom: 5px solid; display: inline-block; } .box-contens p { text-align: left; } .box-footer { background-color: #efefef; padding: 20px; text-align: center; } |
실행화면▼
 |
- 지금부터는 몇가지 새로운 속성이 나오는데 간단히 알고 넘어 갑니다.
- currentcolor : 부모의 색상을 받아 옵니다.

- 부모의 색상을 받아 왔더니 글자가 보이질 않습니다.
- 번거롭지만 이쁘게 꾸미기 위해 또한 글자가 보이게 하기 위해 또다른 속성을 씁니다
- <span>LAUNCH</span> 스팬이라는 태그로 글자를 감싸줍니다.
| html | css |
| <!DOCTYPE html> <html> <head> <title>Robots</title> <link rel="stylesheet" href="style.css"> </head> <body> <div class="box red"> <img class="box-robot" src="images/robot-red.png"> <div class="box-contens"> <h1>RED</h1> <P>Red Robots ipsum dolor sit amet, consectetuer adipiscing elit. Aenean commodo ligula eget dolor. Aenean massa. Cum sociis natoque penatibus et magnis </P> </div> <div class="box-footer"> <a href="" class="button"><span>LAUNCH</span></a> </div> </div> <div class="box blue"> <img class="box-robot" src="images/robot-blue.png"> <div class="box-contens"> <h1>BLUE</h1> <P>Red Robots ipsum dolor sit amet, consectetuer adipiscing elit. Aenean commodo ligula eget dolor. Aenean massa. Cum sociis natoque penatibus et magnis </P> </div> <div class="box-footer"> <a href="" class="button"><span>LAUNCH</span></a> </div> </div> <div class="box green"> <img class="box-robot" src="images/robot-green.png"> <div class="box-contens"> <h1>GREEN</h1> <P>Red Robots ipsum dolor sit amet, consectetuer adipiscing elit. Aenean commodo ligula eget dolor. Aenean massa. Cum sociis natoque penatibus et magnis </P> </div> <div class="box-footer"> <a href="" class="button"><span>LAUNCH</span></a> </div> </div> </body> </html> |
h1, p { margin: 0; } a { color: inherit; /* 부모의 색상을 상속 받겠다*/ text-decoration: none; /*태그의 밑줄을 없애겠다*/ } /* 위에 속성은 초기화 과정 입니다*/ body { background-color: #999; text-align: center; } .box { background-color: white; width: 350px; margin: 400px auto 0; text-align: center; display: inline-block; } .box.red { color: orangered; } .box.blue { color: blue; } .box.green { color: green; } .box-robot { margin-top: -300px; } .box-contens { padding: 20px; } .box-contens h1 { margin-bottom: 20px; background-color: antiquewhite; border-top: 5px solid; border-bottom: 5px solid; display: inline-block; } .box-contens p { text-align: left; } .box-footer { background-color: #efefef; padding: 20px; text-align: center; } .button { background-color: currentcolor; } .button span { color:white; } |
실행화면▼
 |
12. 최종 결과물 ( 추가된 요소만 확인을 해봅니다.)
| html | css |
| <!DOCTYPE html> <html> <head> <title>Robots</title> <link rel="stylesheet" href="style.css"> </head> <body> <div class="box red"> <img class="box-robot" src="images/robot-red.png"> <div class="box-contens"> <h1>RED</h1> <P>Red Robots ipsum dolor sit amet, consectetuer adipiscing elit. Aenean commodo ligula eget dolor. Aenean massa. Cum sociis natoque penatibus et magnis </P> </div> <div class="box-footer"> <a href="#" class="button"><span>LAUNCH</span></a> </div> </div> <div class="box blue"> <img class="box-robot" src="images/robot-blue.png"> <div class="box-contens"> <h1>BLUE</h1> <P>Red Robots ipsum dolor sit amet, consectetuer adipiscing elit. Aenean commodo ligula eget dolor. Aenean massa. Cum sociis natoque penatibus et magnis </P> </div> <div class="box-footer"> <a href="#" class="button"><span>LAUNCH</span></a> </div> </div> <div class="box green"> <img class="box-robot" src="images/robot-green.png"> <div class="box-contens"> <h1>GREEN</h1> <P>Red Robots ipsum dolor sit amet, consectetuer adipiscing elit. Aenean commodo ligula eget dolor. Aenean massa. Cum sociis natoque penatibus et magnis </P> </div> <div class="box-footer"> <a href="#" class="button"><span>LAUNCH</span></a> </div> </div> </body> </html> |
h1, p { margin: 0; } a { color: inherit; /* 부모의 색상을 상속 받겠다*/ text-decoration: none; /*태그의 밑줄을 없애겠다*/ } /* 위에 속성은 초기화 과정 입니다*/ body { background-color: #999; text-align: center; } .box { vertical-align: bottom; /* 이 속성은 고급 과정 입니다. 지금은 그냥 이런것이 있다고 알고만 넘어 갑니다. 이 태그는 가장 마지막에 적용시켜 줍니다.*/ background-color: white; width: 350px; margin: 400px auto 0; text-align: center; display: inline-block; } .box.red { color: orangered; } .box.blue { color: blue; } .box.green { color: green; } .box-robot { margin-top: -300px; } .box-contens { padding: 20px; } .box-contens h1 { margin-bottom: 20px; background-color: antiquewhite; border-top: 5px solid; border-bottom: 5px solid; display: inline-block; } .box-contens p { text-align: left; } .box-footer { background-color: #efefef; padding: 20px; text-align: center; } .button { background-color: currentcolor; padding: 10px 20px 10px; display: inline-block; border-bottom: 5px solid rgba(0,0,0,0.2); } .button:active { border-bottom: 0; margin-top: 5px; } /* active는 가상 클래스 입니다.*/ .button span { color:white; } |
실행화면▼
 |
https://drive.google.com/file/d/1Ek5ajqWw6Ogo5FU1k_Eoi9vscgJTJbmB/view?usp=sharing
Google Drive: 로그인
이메일 또는 휴대전화
accounts.google.com